
This guide brings the Canvas LTI-Advantage instructions together in one place. Each section is listed in our recommended order to correctly link your section, create assignment deep links, map assignments, and enable automatic grade syncing.
Before you begin: These instructions apply to the LTI-Advantage tools, not the older LTI 1.1 tools. If you are unsure which version your school uses, email support@hawkeslearning.com.
Table of Contents
Integration Onboarding for Canvas Administrators
Adding the Hawkes Sync Tool and Single Sign On Link
Link your Hawkes Section to Canvas
Create and Publish Assignment Deep Links
Map Assignments and Create Grade Associations
Manually Link Students with the Students Tab
Enable Automatic Grade Sync
Manually Sync Assignment Grades
Sync Final Grades Manually
Set up a Copied Course Shell
Setting up a new course? Follow the setup sections in order. Student linking is automatically done when students use Single Sign On or click on an Assignment Deep Link. You do not need to manually link students.
Starting with a copied Canvas course? Go to Set up a copied course shell for the steps you must complete for the new term.
Integration Onboarding for Canvas Administrators
If your school needs to onboard the Hawkes Learning LTI-Advantage tools in Canvas, email support@hawkeslearning.com. Please include your school name and your Canvas admin's name and email address.
Hawkes Learning will reach out to the school's Canvas admin to start the onboarding process.
Once the tools are available at your school, instructors can continue with the course-level setup below.
Adding the Hawkes Sync Tool and Single Sign On Link
LTI-Advantage uses one Hawkes Learning link for instructors and students. Your Canvas role determines what opens: instructors access the Hawkes Sync Tool, and students access Single Sign On.
- As an instructor, open your course in Canvas and select Settings.

- Select the Navigation tab.
- Scroll to the disabled items area and find Hawkes Learning.

- Drag Hawkes Learning into your course navigation list.

- Select Save.
The Hawkes Learning link now appears in your course navigation.
Note: Canvas accounts with an Instructor role cannot use this link to launch the Hawkes Learning student experience, even in Canvas student view. When an instructor switches to student view, Canvas removes the email address from the profile, preventing Single Sign On from working as it would for an actual student.
Link your Hawkes Section to Canvas
- Open your Canvas course as an instructor and select the Hawkes Learning link to launch the Hawkes Sync Tool.
- Sign in with your Hawkes Teach account email and password.
- Select the Hawkes course that matches your Canvas course.
- Select your name as the instructor and the corresponding Hawkes section.
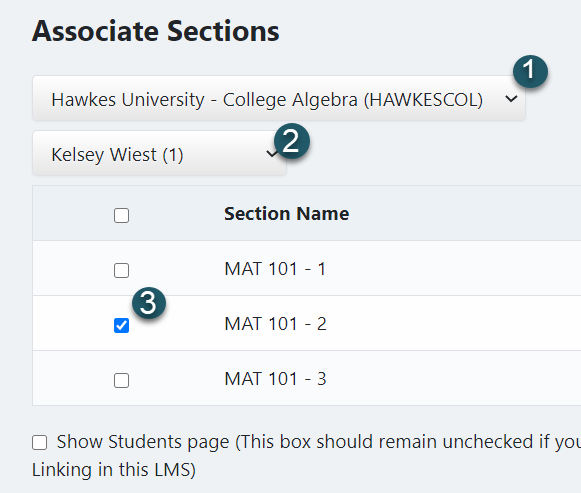
- Select Continue.
Your Hawkes section is now linked to your Canvas course. In most cases, you should link only one Hawkes section to each Canvas course.
Note: If the Hawkes Learning link is missing, complete Add the Hawkes Learning link. If the expected Hawkes course is not listed or you linked the wrong section, contact support for assistance.
Create and Publish Assignment Deep Links
Assignment deep links let students open a specific Hawkes assignment directly from Canvas, bypassing the Hawkes sign-in page and dashboard navigation.
Deep linking also enables Hawkes Single Sign On. When students select their first Hawkes assignment, Single Sign On creates their Hawkes account, enrolls them in the correct section, and provides temporary access.
Note: Instructors must enter section start and end dates in the Hawkes Grade Book for students to receive temporary access at the start of the term.
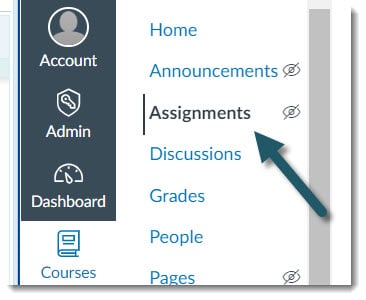
- Go to your Canvas course and select Assignments in the left-side navigation.
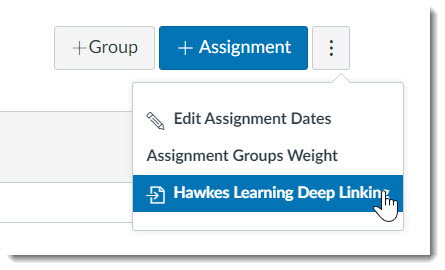
- Select the three-dot menu next to + Assignment and select the Hawkes Learning Deep Linking tool.
- In the window that opens, select the assignment or assignments you want to add, then select Create Links in the upper-right corner.
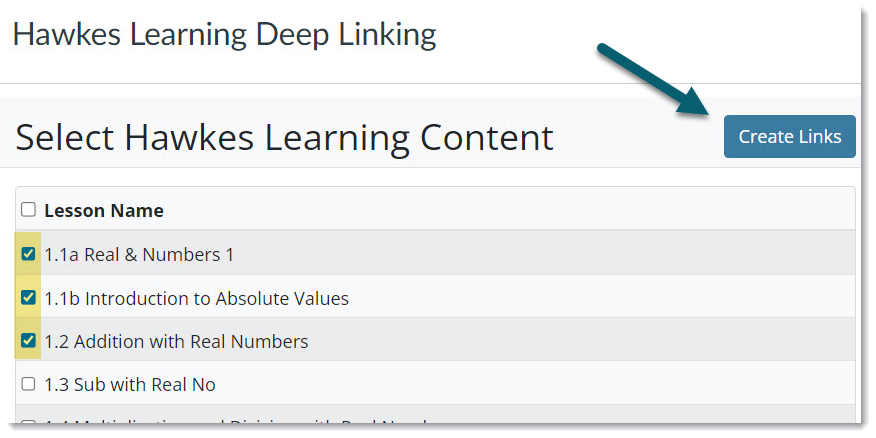
The deep links appear in Canvas under Assignments, including their due dates and point values. Corresponding assignment grading columns are also created under Grades.
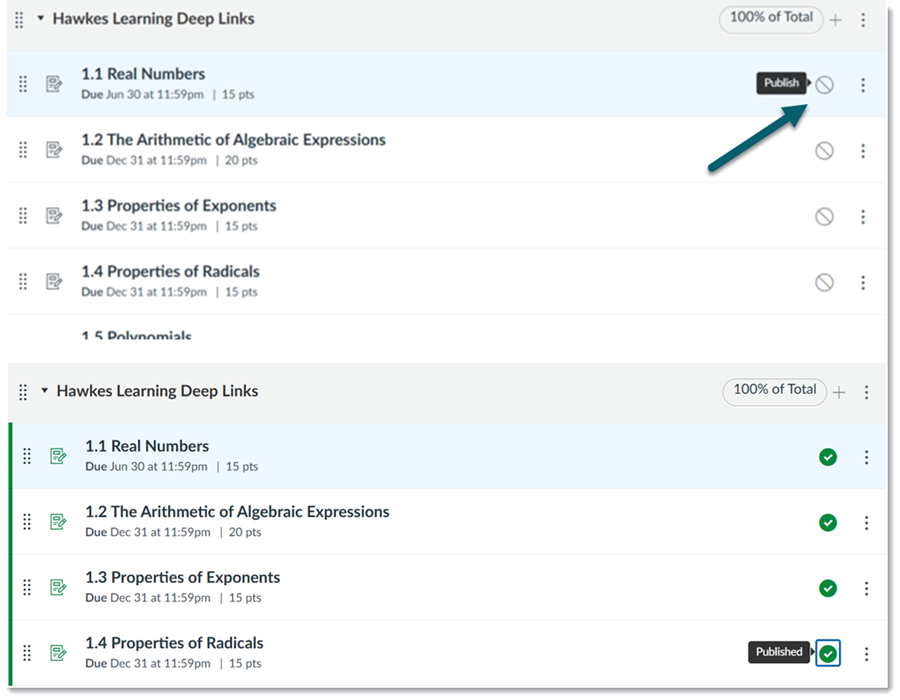
Deep links are unpublished by default and grades cannot sync if any assignments are unpublished. To make them visible to students:
- Open Assignments in your Canvas course.
- Select the publish icon for each assignment. The icon turns green when the assignment is published.
Map Assignments and Create Grade Associations
Creating a deep link and its Canvas grading column does not complete the grade association. Finish this step before syncing grades:
- Open the Hawkes Sync Tool from your Canvas course.
- Go to the Assignments tab, select the assignment(s) you created Deep Links for, and select Sync. Note: Each assignment should already be associated with an existing grade column as shown below.
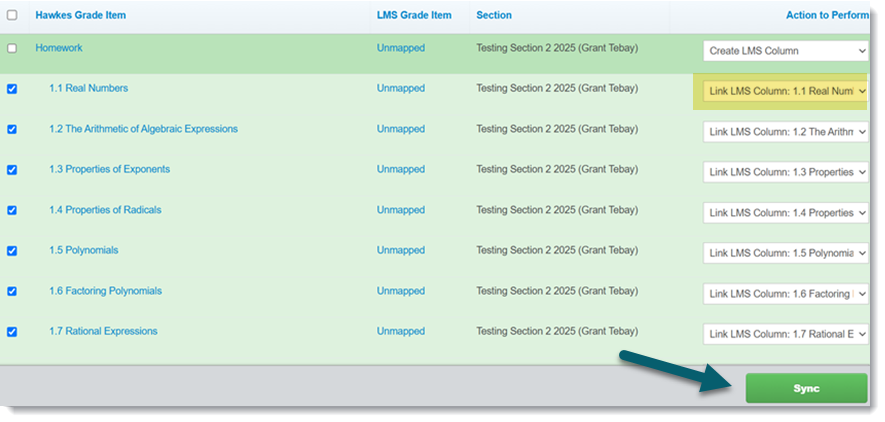
- Select Sync.
- Select Confirm to complete the associations.
If you do not want to have assignment deep links in your Canvas course, but would still like to have grade columns linked to Hawkes for grades to sync, follow the steps below.
- Open your Canvas course and launch the Hawkes Sync Tool. If prompted, link the corresponding Hawkes section.
- Select the Assignments tab.
- If you have more than 40 Hawkes Grade Items, open the Results menu and select Show All so all items are available.
- Select the checkboxes next to the individual assignments you want to sync. Individual assignments appear in light green rows; assignment groups appear in dark green rows.
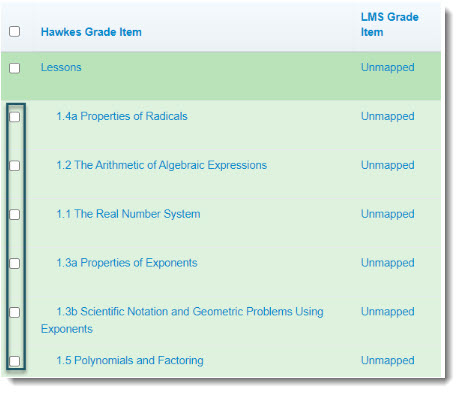
- Review Actions to Perform for each selected assignment:
- Select Create LMS Column if you need a new Canvas column.
- Select the corresponding Canvas assignment name if the column already exists, including columns created through deep linking or copied from another course.
- Select Sync.
- Select Continue and Confirm on the following pages.
Recommendation: Sync individual Hawkes assignments rather than assignment groups. Assignment group grades will not be fully accurate until all due dates have passed.
Manually Link Students with the Studnets Tab
Students are linked automatically when they use Single Sign On or an assignment deep link. You generally do not need to link those students manually.
Use the Students tab when you are not using Single Sign On and need to link students for grade syncing, send temporary access codes in bulk, or enroll students in the correct Hawkes section. A student who creates an account directly through Hawkes rather than through Single Sign On is not automatically linked to your Canvas course for grade syncing.
- Open your Canvas course and launch the Hawkes Sync Tool.
- Select Setup in the upper-right corner and sign in with your Hawkes Teach email and password. On your first visit to the tool in a course, you may be prompted to sign in immediately.
- At the bottom of the sections list, select Advanced Settings, then select Show Students page.

- Select Continue.
- Find the Canvas students displayed as unlinked. Select them and choose Link to match them with an existing Hawkes username or send a Temporary Access Code if they do not yet have access.
- If a student already has an Access Code enrolled in your Hawkes Grade Book, check the Recommended Hawkes Student column for a match. If no matching student is shown but the student already has an Access Code enrolled in your Hawkes course, select Browse and choose the student's name.
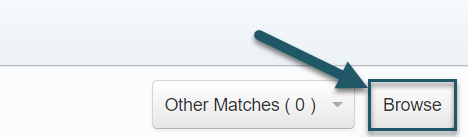
- Select Continue, then select Continue again to finish linking.
Important: Wait until the Hawkes section start date before creating Temporary Access Codes through the Sync Tool. Before that date, the codes will not be generated or sent.
Enable Automatic Grade Sync
LTI-Advantage offers two automatic grade-sync options:
- Daily: Transfers grades every 24 hours, normally overnight.
- Immediate: Transfers an assignment grade a few seconds after the student completes the assignment in Hawkes.
- Open your Canvas course and launch the Hawkes Sync Tool.
- Select the Schedule Sync tab.
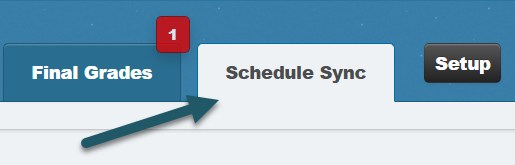
- Select Enable Automatic Grade Sync.
- Choose Daily or Immediate.
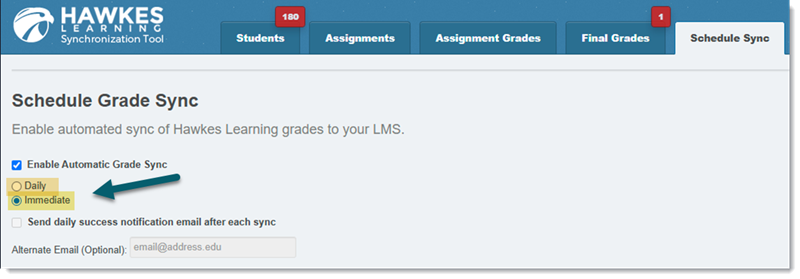
- Select Save.
Note: Daily success-notification emails are available only for Daily sync, not Immediate sync.
Manually Sync Assignment Grades
Preform a manual grade sync if you are not using automatic grade sync, want to control when grades transfer, or need to transfer grades earned before Immediate sync was enabled.
- Open your Canvas course and launch the Hawkes Sync Tool.
- Select the Assignment Grades tab.
- If you have more than 40 students, open Results and select Show All so all students are available.
- Select the checkbox next to Student Name/Assignment Name to select all students and assignments.
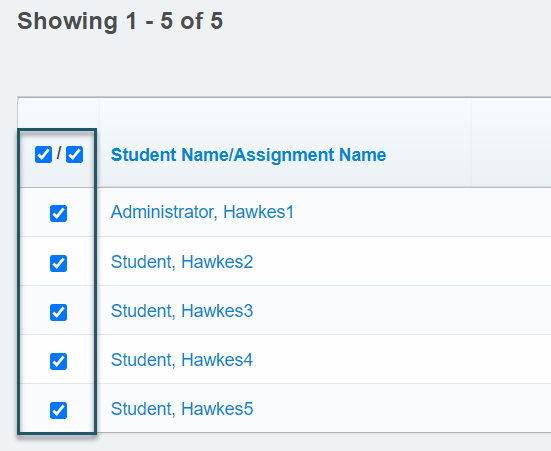
- Select Sync.
- On the confirmation page, select all students and assignments again, then select Continue.
- Select Confirm.
The grade-sync process begins and transfers the selected grades to Canvas.
Important: If you have more than 40 students and do not select Show All, some student grades will not be included.
Sync Final Grades Manually
Most instructors do not need a separate final-grade sync. If you sync individual assignments or assignment groups and have configured grade weights in Canvas, you do not need to sync final grades.
Use this option when you want one comprehensive Hawkes final grade in Canvas instead of individual assignment or assignment group grades.
- Open your Canvas course and launch the Hawkes Sync Tool.
- Select Setup in the upper-right corner and sign in with your Hawkes Teach email and password. On your first visit to the tool in a course, you may be prompted to sign in immediately.
- At the bottom of the sections list, select Advanced Settings, then select Show Final Grades Tab.
- Select Continue.
- Select the Final Grades tab.
- If you have more than 40 students, open Results and select Show All.
- Select the checkbox next to LMS Name to select all students.
- Select Sync.
- On the confirmation page, select all students again and select Continue.
- Select Confirm to begin syncing final grades.
Important: If you have more than 40 students and do not select Show All, some final grades will not be included.
Set up a Copied Course Shell
When you use the Canvas copy tool, the following items transfer to the new course shell:
- The Hawkes Learning link for the instructor Sync Tool and student Single Sign On.
- Assignment deep links.
- Assignment grading columns.
The copied items do not complete the integration for the new course. Before using the copied course for the current term:
- Link the new Canvas course to its corresponding Hawkes section.
- Create grade associations between Hawkes assignments and the existing, copied Canvas grading columns.
- Enable automatic grade sync.