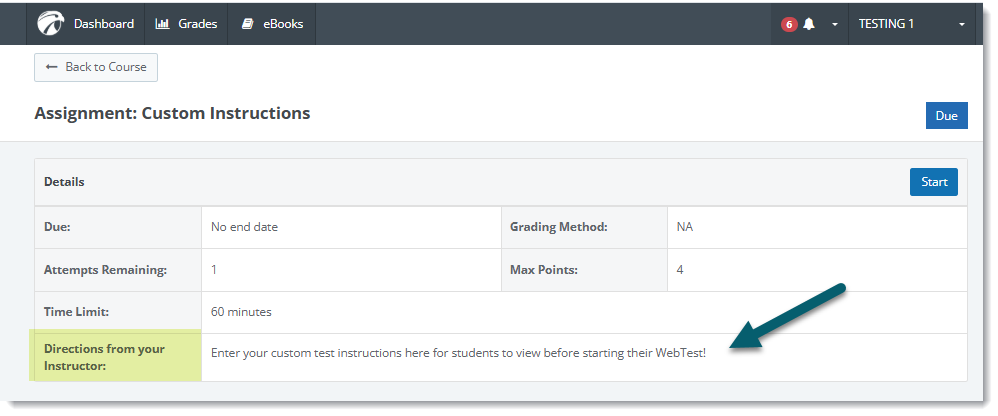
Instructors can add custom directions to a WebTest which will display to students on the WebTest introduction page.
These directions can also include links that automatically open in a new window, giving students easy access to additional resources or materials to use with the test.
Note: Links are not currently supported with WebTests using Respondus LockDown Browser or Monitor.
How to Add WebTest Directions
-
Log in to your Teach account and enter your Hawkes course.
-
Go to Assignments > WebTests.
-
Select Create New or the edit icon to open an existing WebTest.
Note: WebTest Directions cannot be added to a WebTest that's currently assigned. The WebTest must be un-assigned first to add directions. -
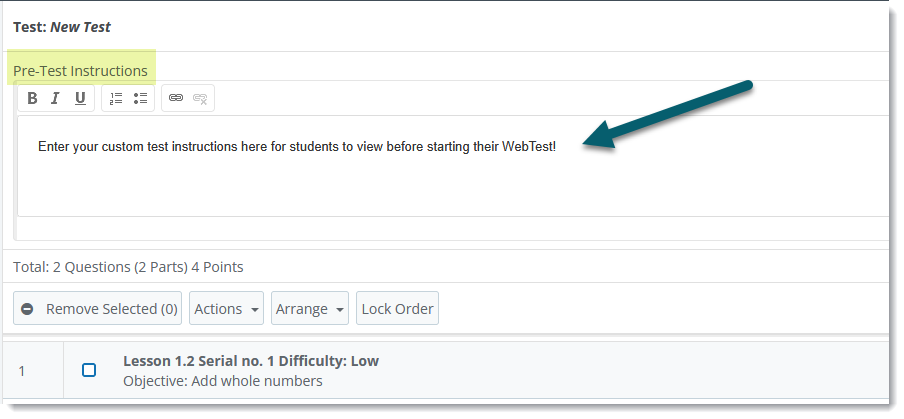
On the right-hand side under Pre-Test Instructions, enter your instructions.
-
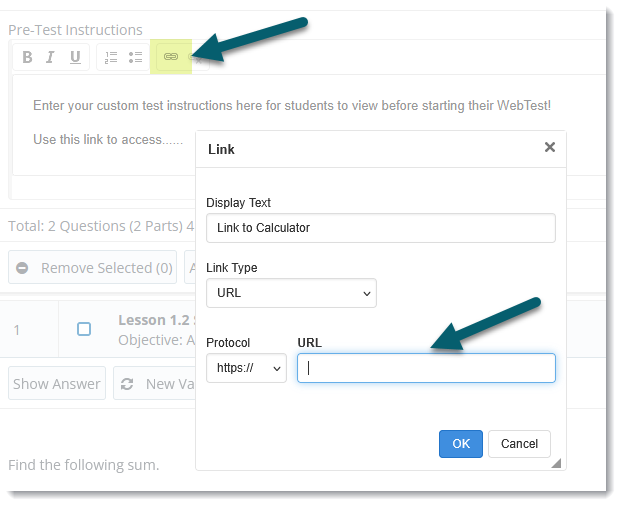
To include a link, select the Link icon.
-
Enter the display text, choose the Link Type, and enter the URL.
- Once finished creating the WebTest, select Save As or Save in the top-right corner.
Viewing Directions as a Student
Students will see the custom directions display on their WebTest introduction page, and can open any links that have been added before starting the WebTest.